Every style, same picture
The style picker gives each option a small thumbnail and a line of description. That is enough to tell two apart and not enough to choose between sixteen, so this page runs all of them on the same image — the bottle cap that ships as the studio's sample.
One picture across all sixteen is the point. Any difference you see below belongs to the style, not to the artwork.
This whole area is an experiment, and it is meant to be played with.
Image to Embroidery sits on the same footing as the type system: both are being actively rebuilt, both will change shape, and neither is finished. What you are looking at is sixteen fixed recipes — each one a pre-wired run through the same underlying steps (separate the artwork, trace it, decide what is a fill and what is a line, choose stitch types, order the sewing).
Where we would like to take it. Those steps are already separate inside the engine; the recipes just hide them behind one button. The obvious next move is to stop hiding them — a node-based graph where you wire the stages together yourself: take the ink separation from one recipe, the fill treatment from another, reorder the sew, and see the result. Every recipe on this page then becomes a preset rather than a wall.
That is a real direction, not a promise, and it is demand-driven — we will build it if people want to use it. If that sounds like something you would reach for, say so: Bug? Tell us in the beta banner, or
hello@bisect.studio. It genuinely decides whether this gets built.

Every image on this page is a screenshot of the studio's own preview, produced by pressing Preview the same way you would. The numbers beside each one were measured off the stitches the engine returned, at a 90 mm finished size with that style's shipped defaults. Change the size or the settings and the numbers change with them.
How to read the numbers. Stitches is needle penetrations. Thread is how much thread ends up on the fabric. Jump travel is distance the machine moves without sewing — on a single-needle machine that is thread you may have to snip. Under 0.5 mm counts stitches shorter than the needle can reliably make; a high number there means the design punches the same area repeatedly instead of stitching it.
Start here
Logo / Artwork

The default, and the right answer for anything with defined colour areas — a logo, a badge, flat artwork. It traces the picture into editable shapes with smooth curves, which you then set stitch types on. It is the only style here that keeps the artwork's own colours.
Use it when you want the design to look like the picture.
Pixel Tiles
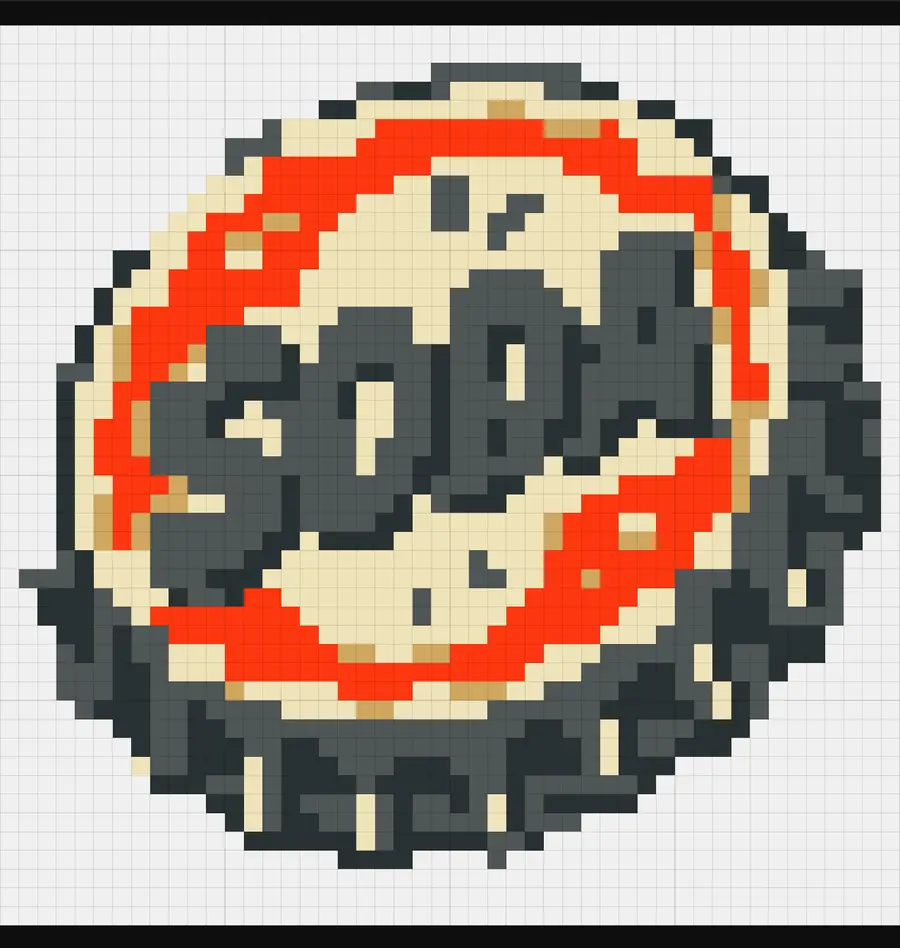
16,158 stitches · 6 thread colours · 0 stitches under 0.5 mm
The most finished thing in this list. Every stitch is the same length, it maps colours to real Brother thread numbers, it fits itself to your hoop and tells you when it had to shrink a cell to do it, and it checks the stitch file it produced by reading it back.
Best for sprites, retro patches and pixel art. Worth trying on a logo too — the constraint suits embroidery.
Outlines and line art
Contour

4,654 stitches · 8.9 m thread · 0.5 m jump travel · 1 stitch under 0.5 mm · 86 × 80 mm
The cleanest line result in the set. The lettering stays legible, the crimped edge survives, the stitch length is even, and what you preview is exactly what gets sewn. One colour.
If you want a drawn version of your artwork rather than a filled one, start here.
Low Poly (beta) · Rounded Outline (beta) · Colour Plates + Outline (beta)
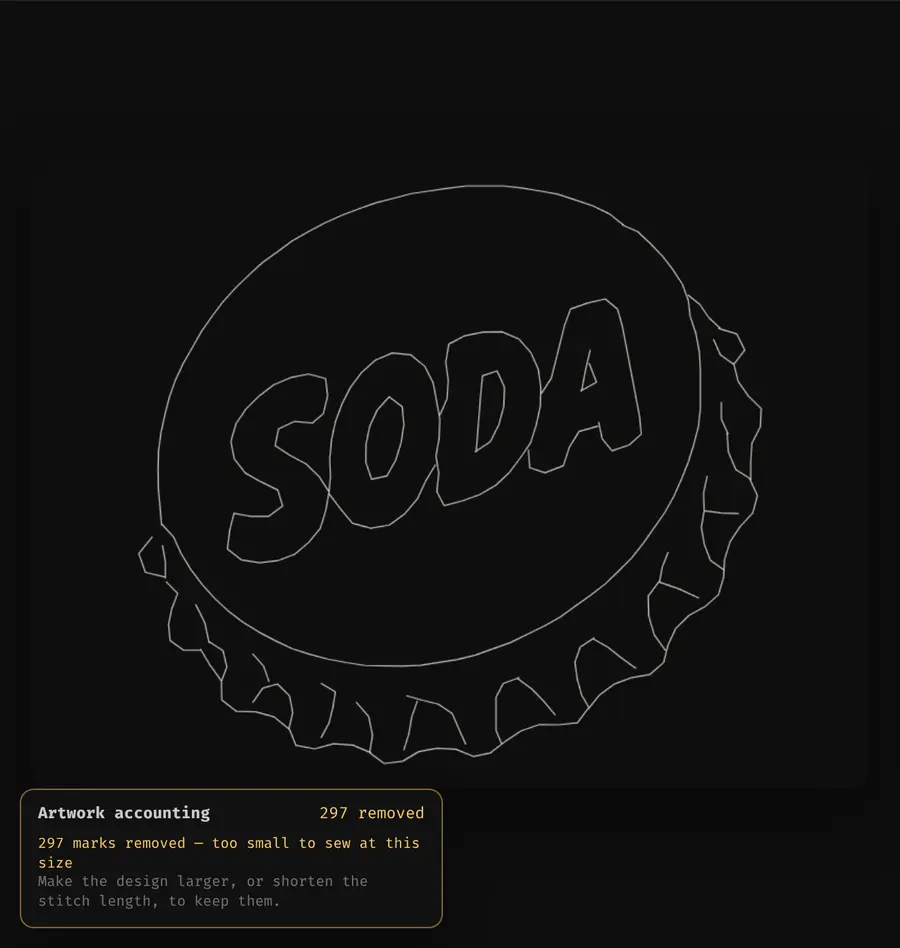
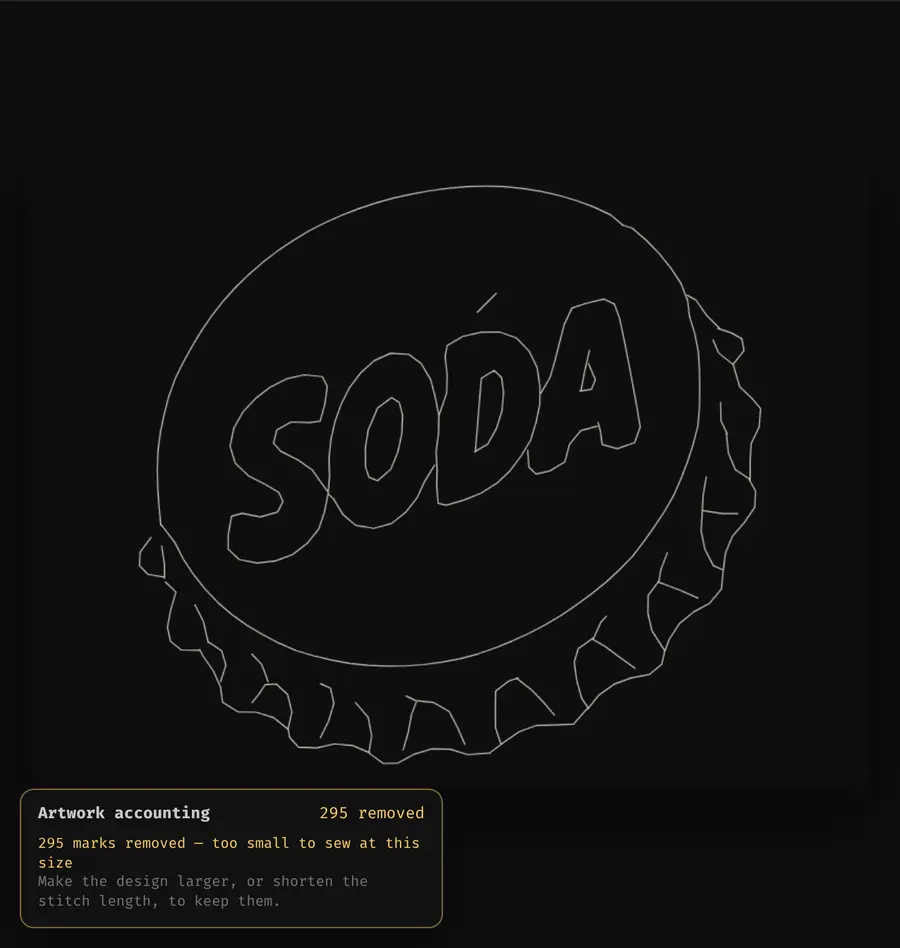
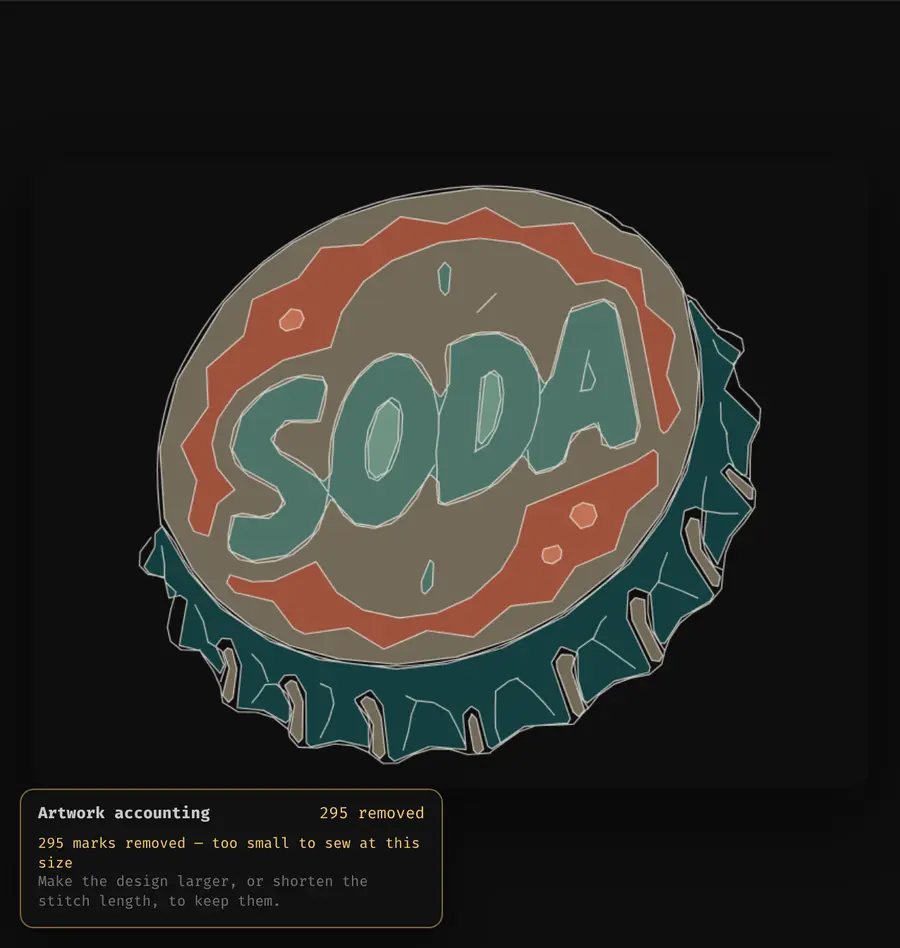
Three views of one idea: separate the black ink from the colour, then sew the ink as a running stitch that follows the drawn line. Low Poly keeps it faceted, so curves come out as straight chords and small shapes read as polygons — that is the look, and it is frozen. Rounded Outline smooths the same line into arcs first. Colour Plates + Outline adds the colour areas underneath as editable fills, with the ink line sewn last on top.
They sew the ink in the artwork's own colour, which on this cap is near-black. Against the preview's dark background that is genuinely hard to see — pick a thread colour explicitly if you want to inspect the result closely.
All three report how many marks they dropped as too small to sew at your chosen size. Read that number before accepting: it is artwork that will not be there.
Colour Plates — Verified (beta)
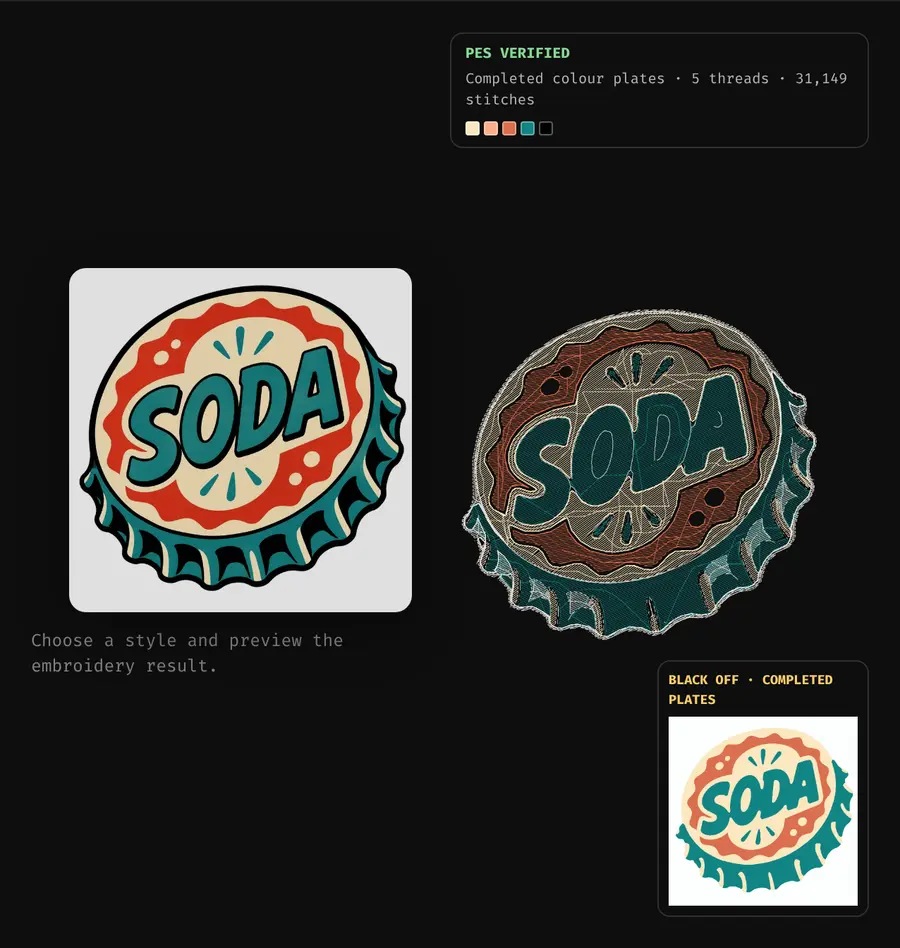
The only style that compiles a full machine plan and then proves it by decoding the stitch file back. Colours are completed underneath the black outline, sewn first, with the keyline last on top — so a shifted stitch cannot open a white gap beside a line.
It is also the slowest thing here and it does not always finish. Measured on this cap it takes 31–55 seconds against a 55-second limit, and roughly half of runs hit the limit and return an error. If it fails, try again; if it fails twice, use Colour Plates + Outline instead.
Texture and tone
These convert the tone of a picture into a texture. None of them will look like your artwork — that is not what they are for. They sew in one colour.
Sashiko
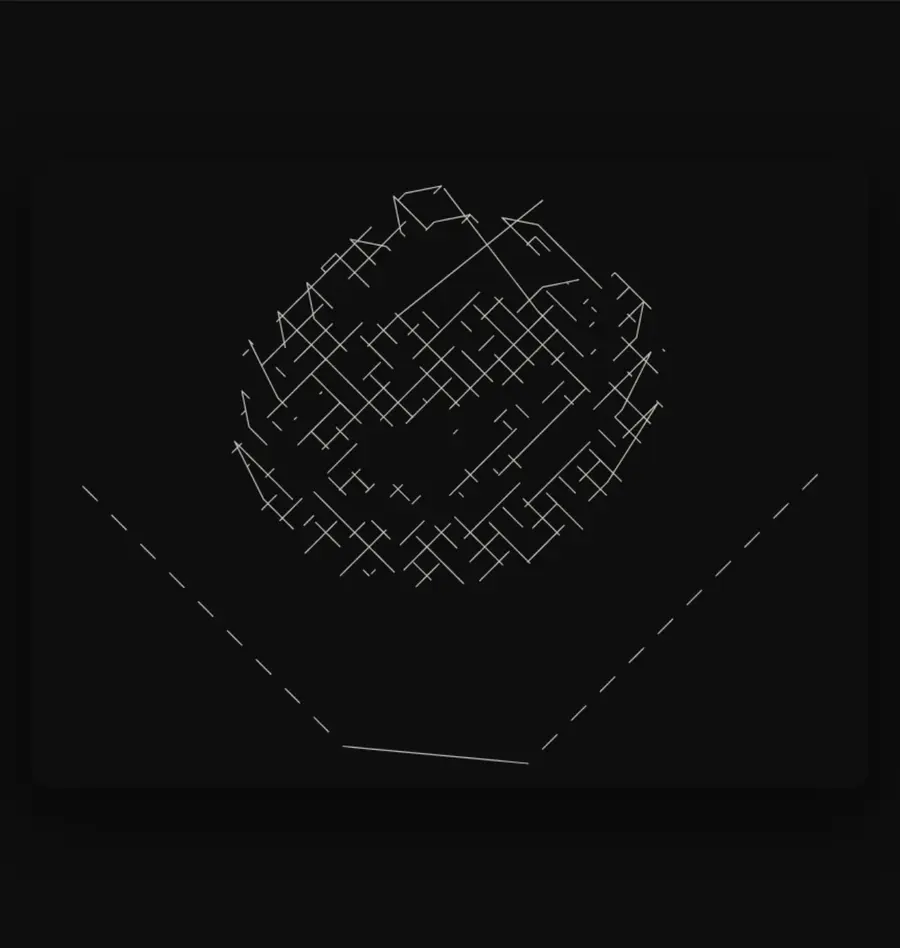
1,213 stitches · 1.4 m thread · 2.5 m jump travel · 144 × 113 mm
Decorative dashed grid, based on Japanese running-stitch work.
Known issue. At a 90 mm target Sashiko returns a 144 × 113 mm design — it draws its grid past the edge of your artwork, and past the edge of a 100 mm hoop. It also lays 2.5 m of jump travel against 1.4 m of actual thread. Check the size and the hoop fit before you accept it.
Stipple
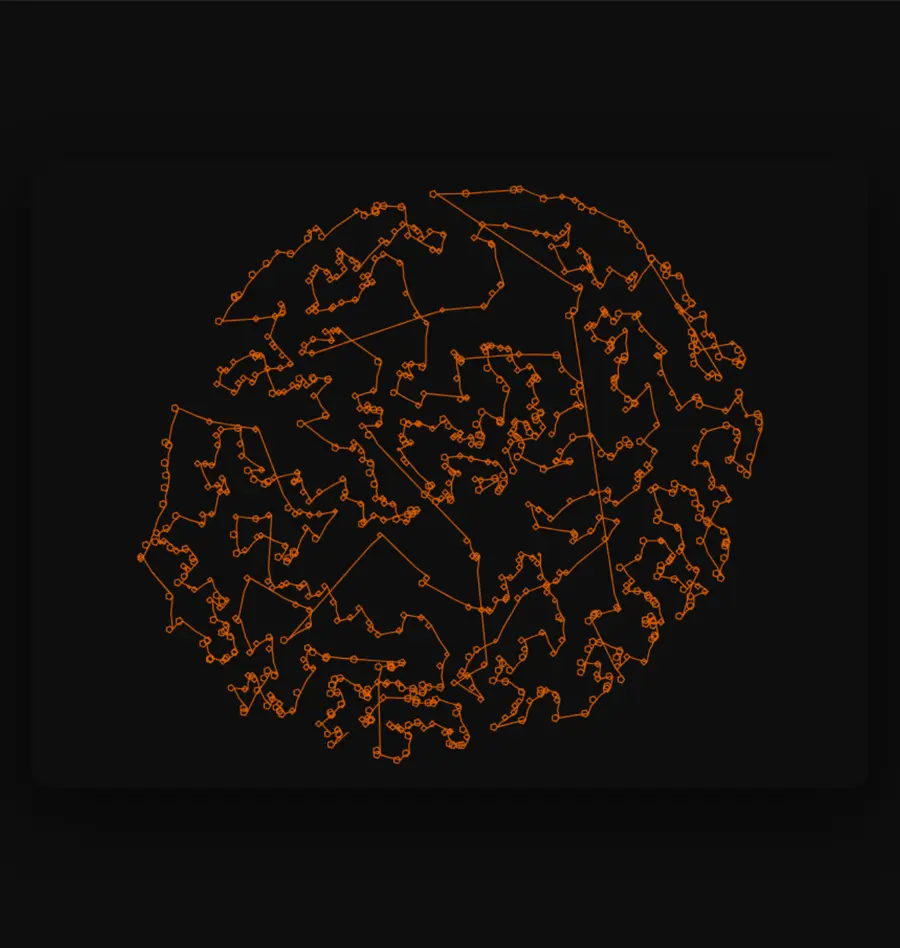
5,369 stitches · 3.8 m thread · 8.1% of stitches under 0.5 mm
Seed-stitch texture from tone. Reads as a soft grey mass rather than as the subject.
Wave
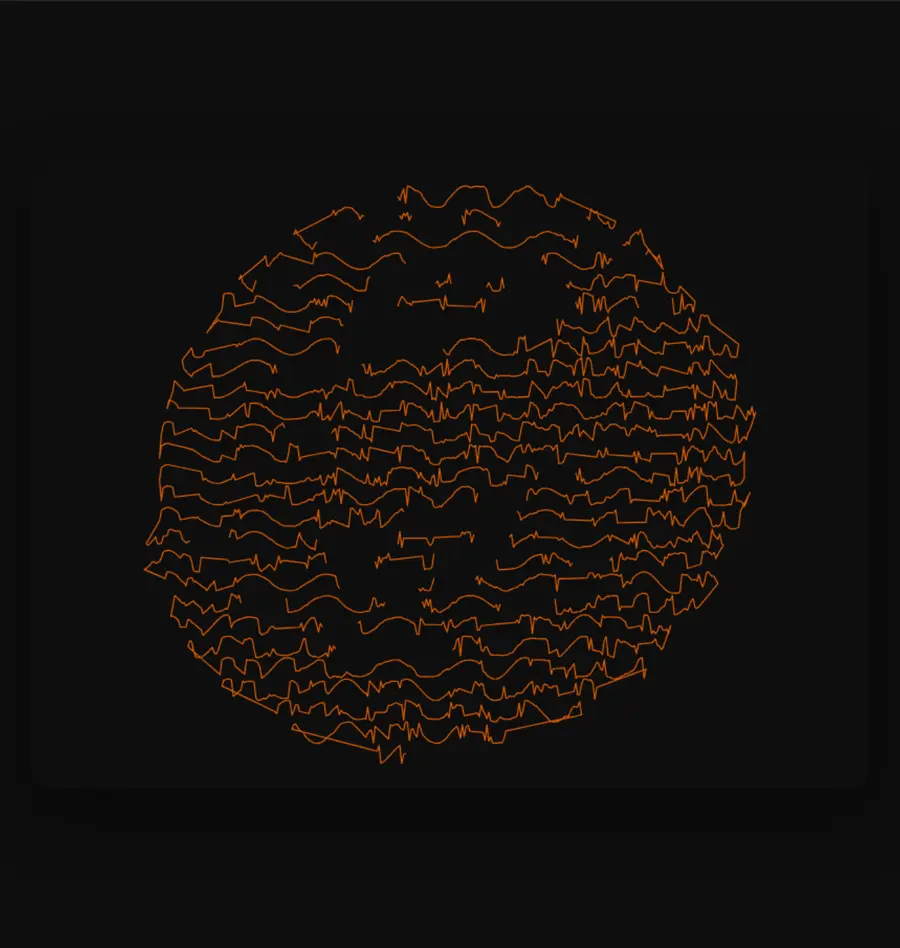
6,205 stitches · 3.0 m thread · 77.5% of stitches under 0.5 mm
Rows of waves that tighten where the picture is dark. Three quarters of its stitches are shorter than the needle reliably makes; a third of them are dropped again on export as redundant, so the file that reaches your machine has about 4,100 stitches rather than the 6,200 the preview drew.
Fine as a texture behind something else. Not a way to render a subject.
Scribble
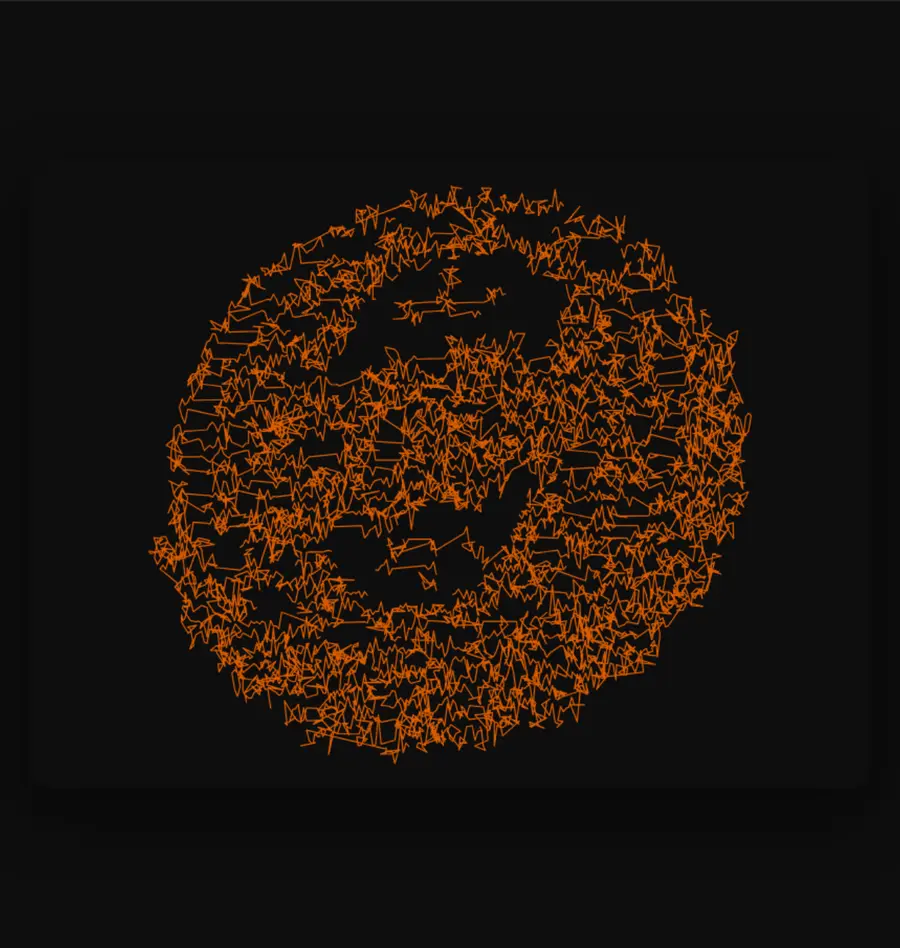
9,059 stitches · 8.9 m thread · 32.4% of stitches under 0.5 mm
Coloring-book chaos, dense where the image is dark.
Watch the size. On simple artwork like this cap, Scribble fills the frame. On busier artwork it can run out of its internal stitch budget partway down and return a design with the bottom missing — measured at 40% missing on a detailed patch design. Always check the preview covers the whole picture before accepting.
Spiral (Abstract)
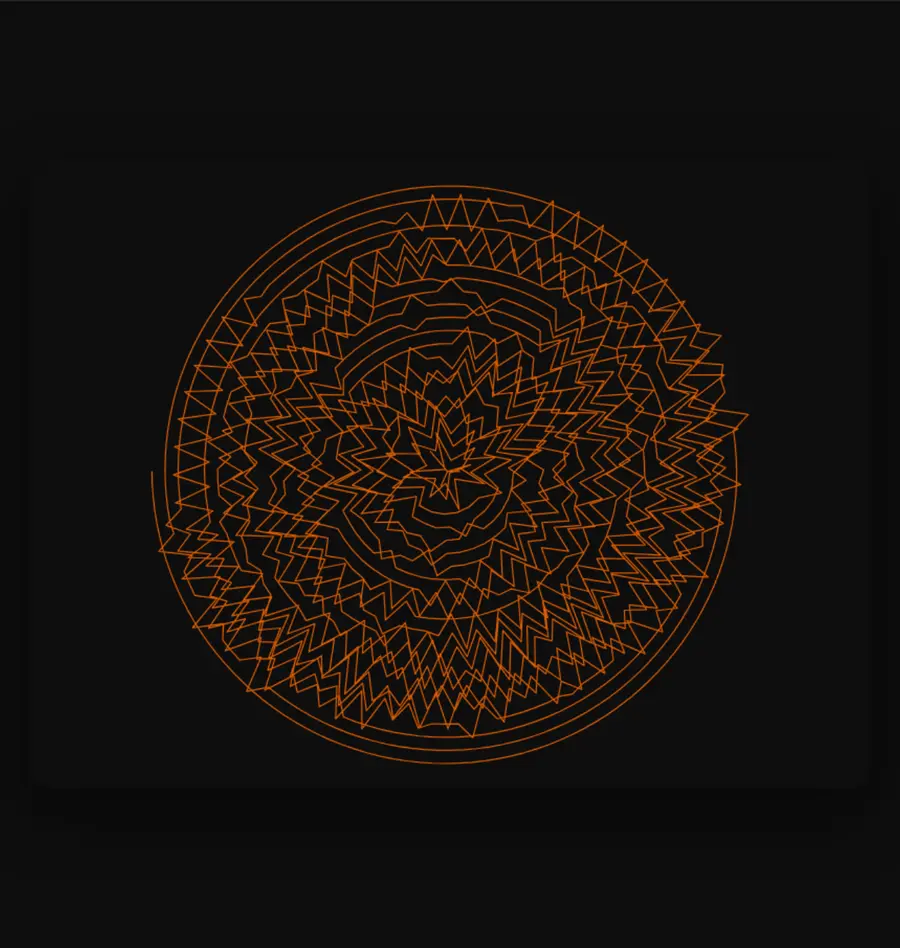
2,608 stitches · 4.9 m thread · no jumps · 0 stitches under 0.5 mm
A single coil across the whole frame, swinging wider in the dark areas. Abstract by design, and mechanically the cleanest thing in this section: one continuous line, no jumps, no short stitches.
Spiral (Subject)
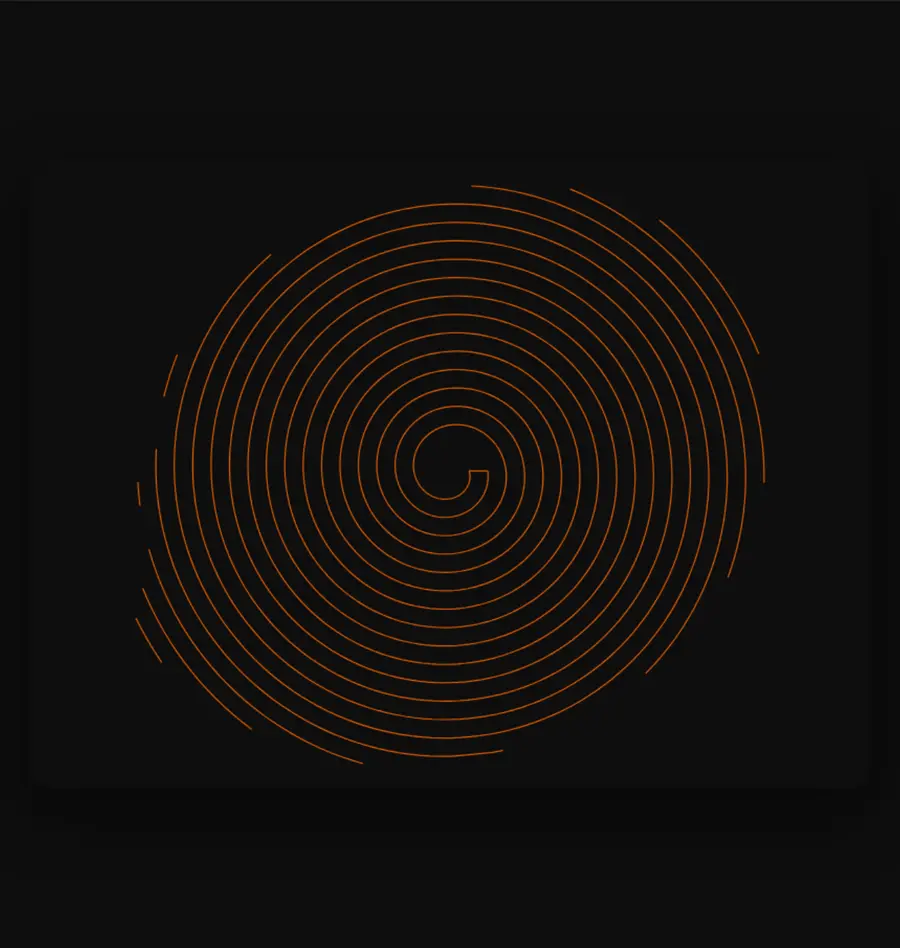
2,558 stitches · 1.7 m thread · 35.5% under 0.5 mm (nearly all removed on export)
Isolates the subject and fills its shape with a spiral. On a circular subject like this cap the result is close to plain concentric rings — it reads as a disc more than as a bottle cap.
One Line · Tonal Line
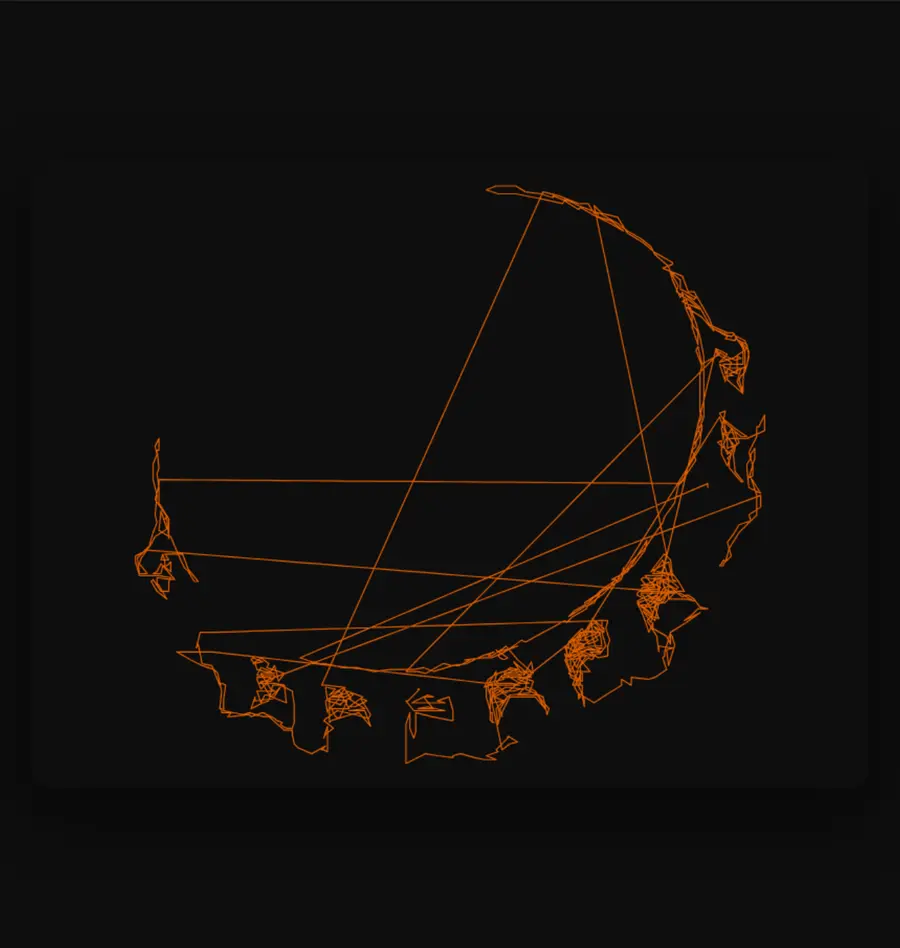
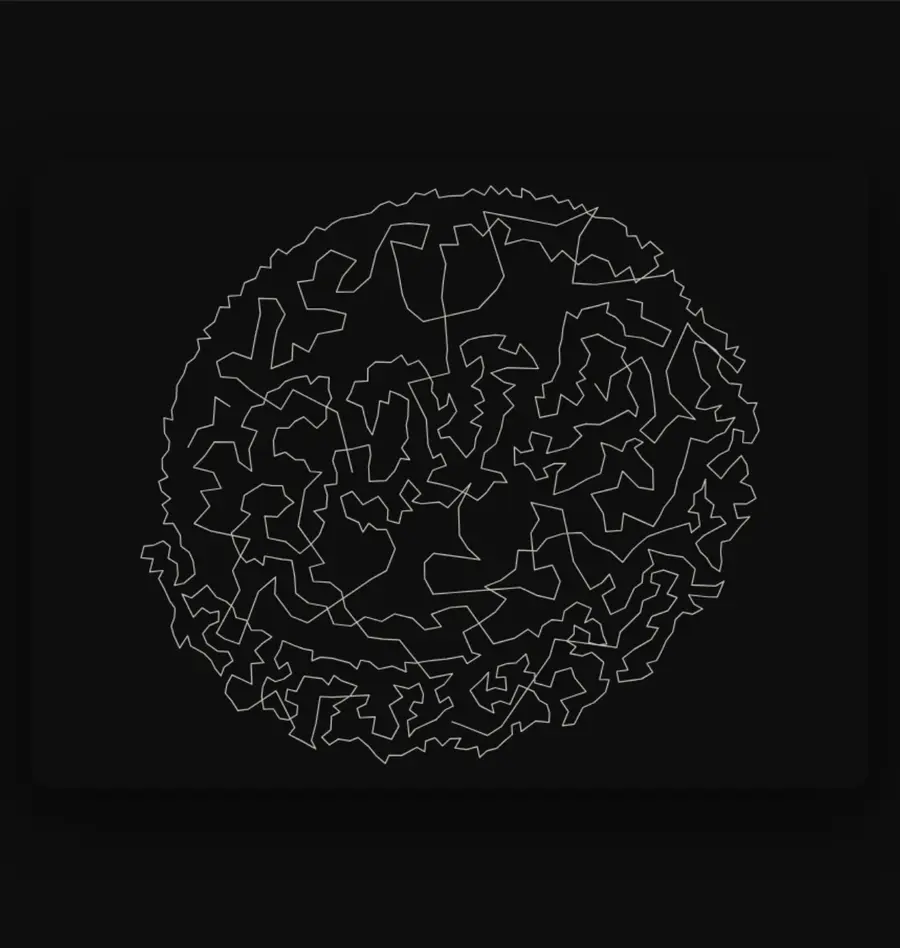
One Line: 1,199 stitches · 2.0 m thread · 11.1% under 0.5 mm Tonal Line: 985 stitches · 1.8 m thread · 0 under 0.5 mm
Both draw the whole picture as one continuous thread. Tonal Line is the better-behaved of the two — no short stitches, essentially no jumps. Neither produces a likeness of a hard-edged graphic like this cap; they are at their best on photographs with soft tonal range.
Thread Painting
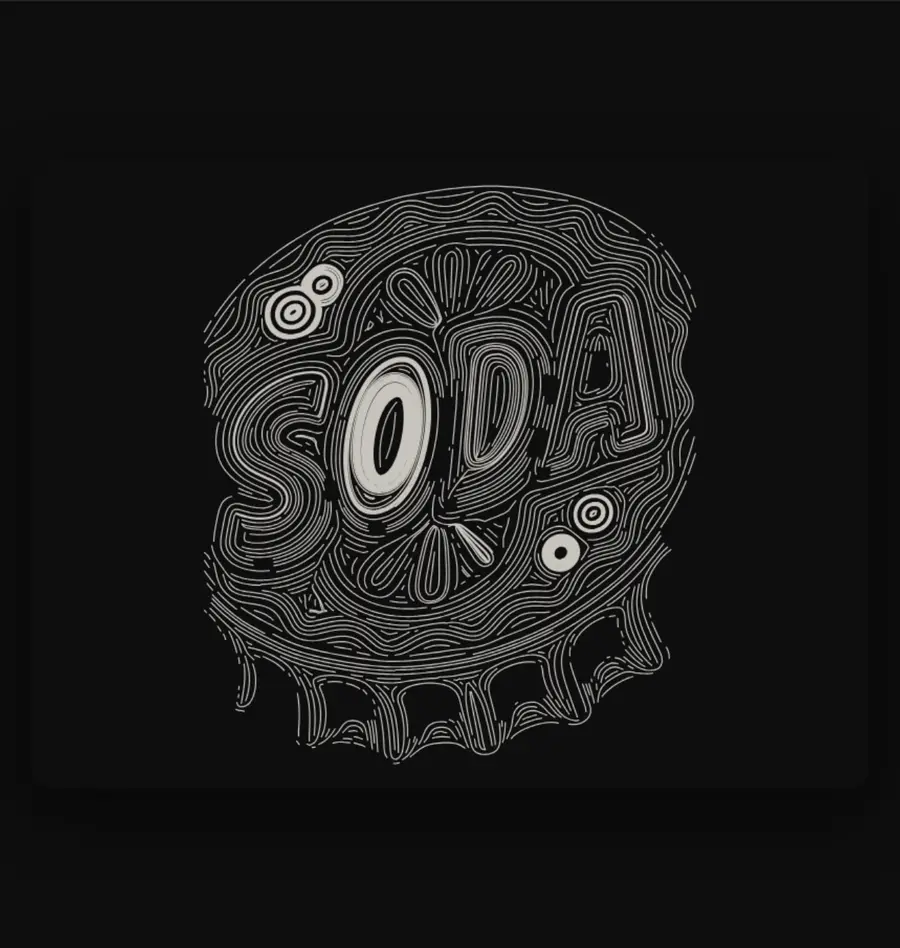
30,755 stitches · 496 jumps · 17.6 m of jump travel · 85.6% under 0.5 mm
Directional stitches that follow the form of the subject, dense where it is dark. It is the most expensive style here by a wide margin, and almost every stitch it makes is at or below the length a needle handles reliably — the export stage removes about 40% of them again as redundant.
Treat it as an experiment for now rather than a way to produce a finished patch.
Picking one
| If you want | Use |
|---|---|
| The design to look like your artwork | Logo / Artwork |
| A retro / pixel look, or the most reliable output | Pixel Tiles |
| A clean drawn outline | Contour |
| Colour areas with a black keyline over them | Colour Plates + Outline |
| A verified machine plan, and you can retry on failure | Colour Plates — Verified |
| Texture rather than a likeness | Spiral (Abstract) or Stipple |
Anything marked (beta) is an experiment left switched on. It may change or disappear between releases.
Where this is going
Sixteen buttons is a symptom, not a design. Each one is a fixed path through the same pipeline, and the reason there are so many is that we kept finding combinations worth keeping and had nowhere to put them except another card.
The pipeline itself is already made of parts — separation, tracing, region classification, stitch-type assignment, sew ordering, routing — and they compose. Exposing them as a node graph would let you build your own conversion instead of picking the nearest one: pull the ink separation out of Low Poly, feed it the fill treatment from Colour Plates, sew the line last, change one node and watch the stitch count move. The recipes here would survive as presets you can open up and edit.
The same is true of the type system, which is being rebuilt around exactly this question — what the reusable pieces are, and where the choices should live.
Neither is scheduled. Both are demand-driven, and the honest position is that we would rather build the one people actually want to use. If a node-based version of this is interesting to you, tell us — Bug? Tell us in the beta banner, or hello@bisect.studio. Saying "I'd use that" is worth more than it sounds; almost nobody does.
Regenerating this page
The images come from scripts/render-recipe-gallery.mjs, which drives the real studio and screenshots the preview pane for each style in turn. With the engine and dev server running:
node scripts/render-recipe-gallery.mjs            # all styles
node scripts/render-recipe-gallery.mjs --only contour
It writes public/manual-images/recipe/<id>.webp and a manifest recording what was captured, how long each took, and whether it succeeded. A style that fails is recorded as a failure rather than left out, so this page cannot quietly stop showing something that stopped working.